Use Flutter UI inside iOS App Extensions
In this article we will explore the basics of setting up an extension and how to use Flutter in it.

In this article we will explore the basics of setting up an extension and how to use Flutter in it.
Flutter has become a very popular choice for mobile developers, it’s style of UI code and the fact that it renders the same on both platforms makes it a strong choice. One of the limitations Flutter did have was with iOS app extensions.
If you are not aware iOS app extensions are a way for you to “extend” your functionality outside of your own app and allowing user’s to interact with it through other apps on their device. This could be the browser, notes app or pretty much any other app. One problem with Flutter was that you would still need to develop the functionality and the UI of your extension using native code while the majority of your app was in Flutter code. This may not be a problem for some of us but I think we can all admit that it is annoying to still have to maintain this native code.
Well Flutter 3.16 changed all this and you can now have your extension UI built with Flutter!
Available for work
If you like this article do check out my other ones, and in case you are looking for help building an app of your own maybe I can help. I work as a freelance mobile developer in my free time. A little shameless plug never hurts right?
Or you can check out my website:
Alright now let’s get started!
What we will be building
Our goal in this article will be rather simple:
Users will select some text from anywhere on their device and share it
Our app should be displayed in the list of choices in the share sheet the OS shows
When the user selects our app they should be shown a simple screen that displays the text they selected
Adding a Share Extension to your Flutter app
Alright so this part is the same whether you were using Flutter or just plain iOS so I wont go into too much detail but just cover the overall steps you need to take:
Open the Runner.xcworkspace file from inside your PROJECT/ios folder. This should launch Xcode. Use File -> New -> Target from Xcode’s menu and you should be presented with something like this:
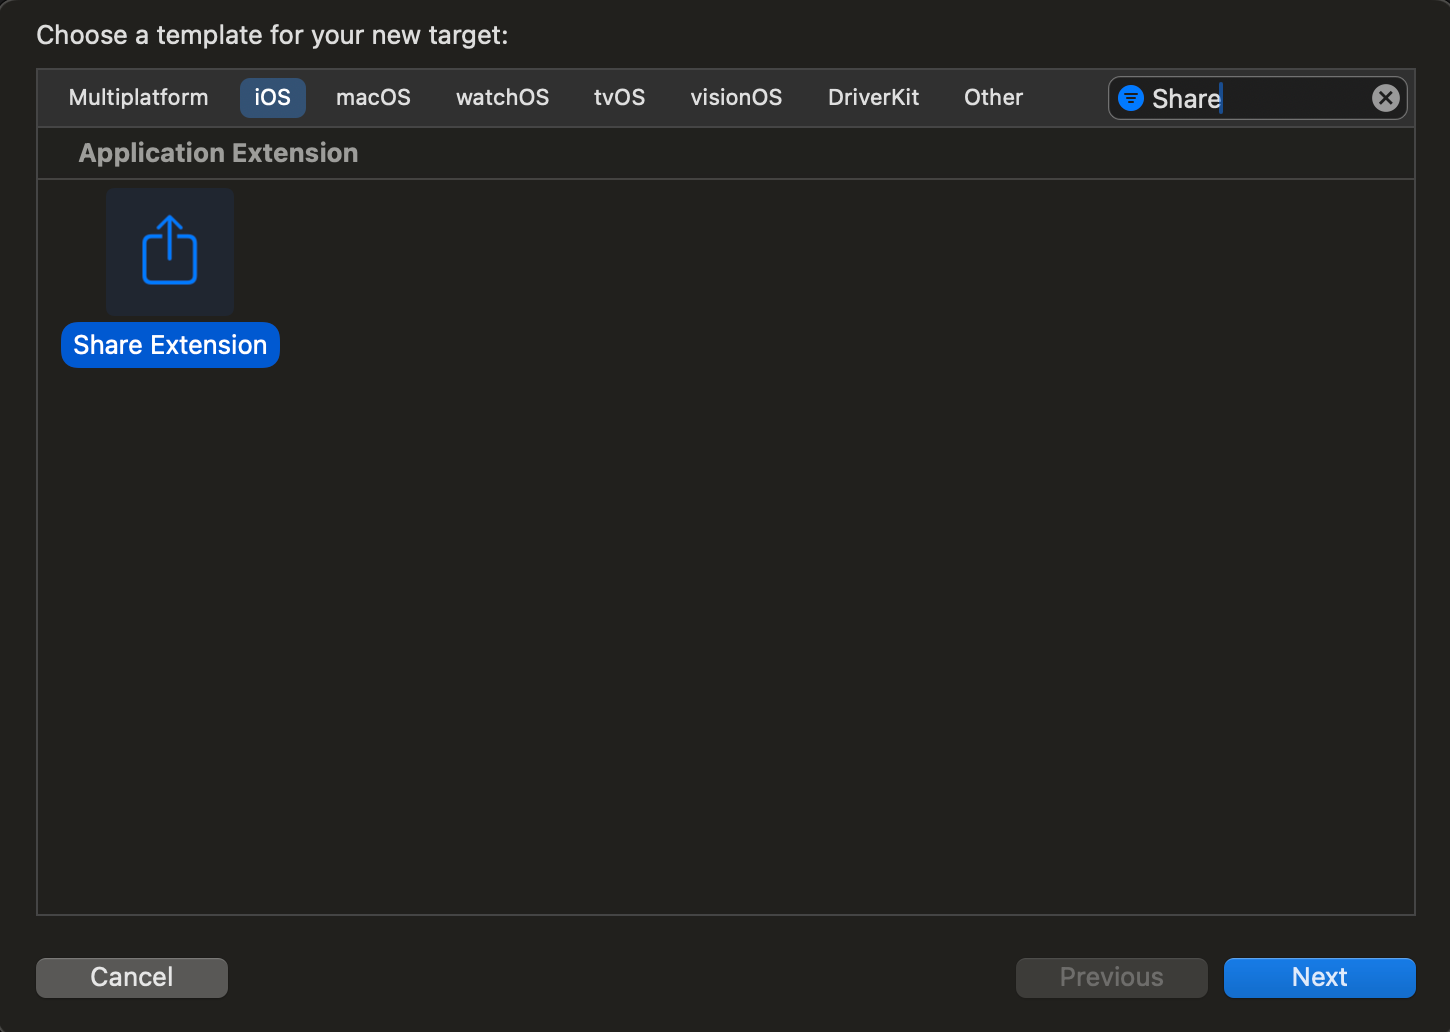
Either find or search for Share Extension and press next.
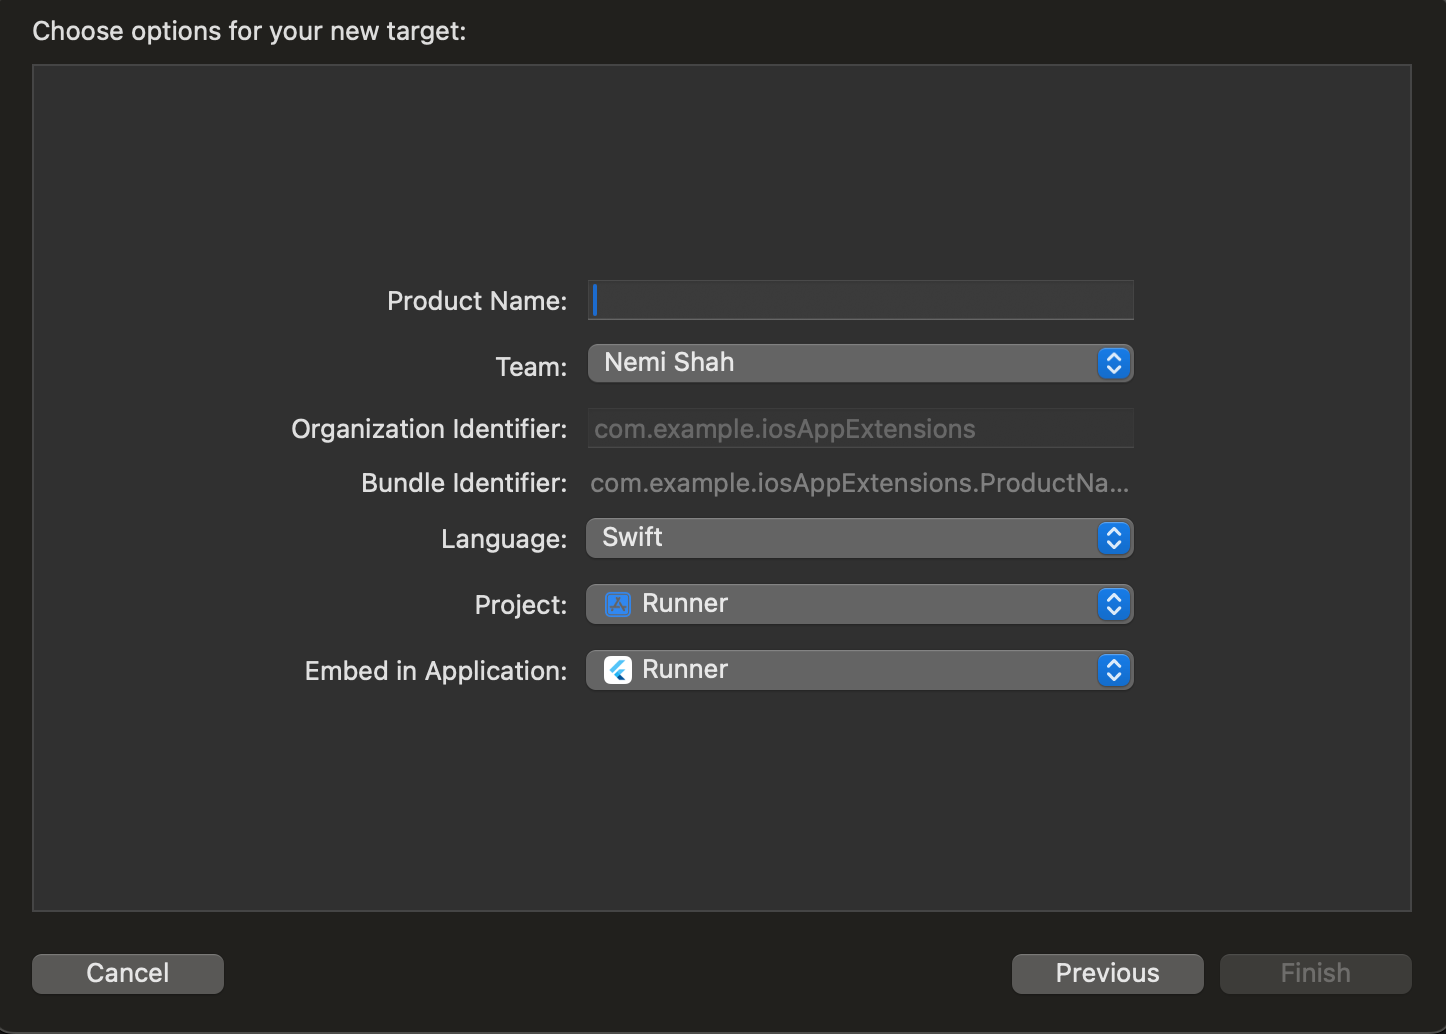
Set the product name to what you want the extension to be called and press “Finish”. After this point you should see a new target in Xcode.
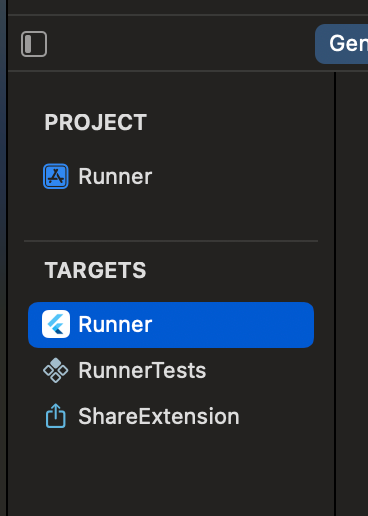
Xcode will generate some boilerplate for your extension and at this point you should be able to test it out by running it in a simulator (or device) and trying to share something.
A few gotchas
If you see an error similar to
Error (Xcode): Cycle inside Runnerwhen running your app navigate to your main target’s build phases and make sure theEmbed Foundation Extensionsstep is immediately after theCopy Bundle Resourcesstep.If Xcode prompts you to “Activate” your extension after you create it, opt in to activating it. Opting out can result in errors that are unclear.
Using Flutter UI in the iOS app extension
Now that we have our extension boilerplate setup, we need to make it use Flutter for its UI instead of the Storyboard that it currently uses.
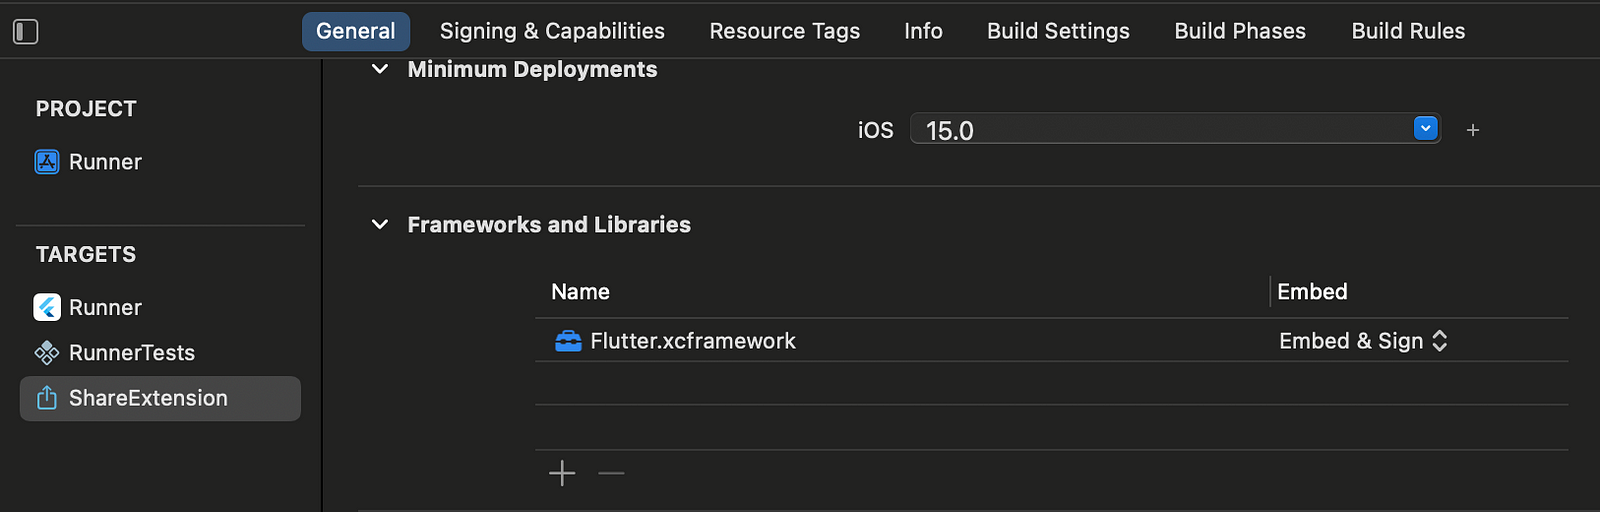
First we need to copy the Flutter framework into our extension. If you navigate to FLUTTER_SDK_LOCATION/bin/cache/artifacts/engine/ios/extension_safe you will find a Flutter.xcframework package. Copy this into the frameworks for your extension in Xcode and make sure that the Embed option is set to Embed & Sign .
Now modify the info.plist file for your extension to look similar to:

NSExtensionPrincipalClasstells the OS which class to use as the root UI controller for this extension. It uses the formatExtensionName.ClassName. Note that by default there should be an entry for the main storyboard file, you will need to remove that entry to make this work.NSExtensionActivationRuleinforms the OS about when this extension should be included in the share sheet. Setting it to the stringTRUEPREDICATEmakes it always be included but you can filter this further to only be included for specific types (for example images only). To learn more about how to configure this visit the official documentation.
Configuring the View Controller to use Flutter
Now let’s modify our ShareViewController to not use the boilerplate code and use Flutter instead. Replace all of it’s contents with this:
import UIKit
import Flutter
import UniformTypeIdentifiers

class ShareViewController: UIViewController {
    override func viewDidLoad() {
         super.viewDidLoad()
         showFlutter()
     }

     func showFlutter() {
         let flutterViewController = FlutterViewController(
            project: nil,
            initialRoute: "/share",
            nibName: nil,
            bundle: nil
          )
         addChild(flutterViewController)
         view.addSubview(flutterViewController.view)
         flutterViewController.view.frame = view.bounds
     }
}
ShareViewController is now a simple UIViewController which loads a FlutterViewController as its child. The initialRoute property let’s us configure what route the Flutter app should open on launch, without this it would default to whatever the home or main route you have configured for your app.
Now let’s modify our Flutter app to account for this, modify the main function to return something similar to this:
return MaterialApp(
  // ...
  routes: {
    '/': (context) => const MyHomePage(title: 'Flutter Demo Home Page'),
    "/share": (_) => const ShareWidget(),
  },
);
I have omitted the boilerplate that Flutter adds during app creation but we add a route for the /share route that we configured on the Swift side of things. This will make sure that when the extension launches the Flutter engine, the user sees our share widget instead of the app’s landing screen.
For now our share widget is a simple Widget with some text in the center.
import 'package:flutter/material.dart';

class ShareWidget extends StatefulWidget {
  const ShareWidget({super.key});

  @override
  State<ShareWidget> createState() => _ShareWidgetState();
}

class _ShareWidgetState extends State<ShareWidget> {
  @override
  Widget build(BuildContext context) {
    return Scaffold(
      body: Center(
        child: Text("Hello!"),
      ),
    );
  }
}
Displaying the text from the share extension in Flutter
Next we want to take the text the user shared and display it in our ShareWidget . First we need to read the text in our Swift class.
Reading shared text inside the share extension view controller
if let item: NSExtensionItem = self.extensionContext?.inputItems[0] as? NSExtensionItem, let itemProvider: NSItemProvider = item.attachments?[0] {
     if itemProvider.hasItemConformingToTypeIdentifier(UTType.text.identifier) {
         itemProvider.loadItem(forTypeIdentifier: UTType.text.identifier) {result,error in
             if error == nil {
                // TODO: Send data to Flutter
             }
         }
     }
 }
This code gets the text data from the extensionContext and for now does nothing. Eventually we will add logic here to send it to the Flutter side of things.
Note: This piece of code works for this example but it is not the safest way of writing this. Ideally you want to iterate all items in self.extensionContext?.inputItems instead of assuming its always just one item.
Sending data from share extension view controller to Flutter
If you have worked with passing data between Flutter and Native you know that one of the go to methods is to use a MethodChannel. Let’s start by setting it up on the Swift side:
func showFlutter() {
     let flutterViewController = FlutterViewController(project: nil, initialRoute: "/share", nibName: nil, bundle: nil)

     let methodChannel = FlutterMethodChannel(name: "examples.share", binaryMessenger: flutterViewController.binaryMessenger)

     if let item: NSExtensionItem = self.extensionContext?.inputItems[0] as? NSExtensionItem, let itemProvider: NSItemProvider = item.attachments?[0] {
         if itemProvider.hasItemConformingToTypeIdentifier(UTType.text.identifier) {
             itemProvider.loadItem(forTypeIdentifier: UTType.text.identifier) {result,error in
                 if error == nil {
                     methodChannel.invokeMethod("setData", arguments: result as! String)
                 }
             }
         }
     }

     addChild(flutterViewController)
     view.addSubview(flutterViewController.view)
     flutterViewController.view.frame = view.bounds
 }
We create a FlutterMethodChannel with the name examples.share , this name is important because it’s value needs to match exactly with the name configured on the channel in Flutter. We then use invokeMethod to call a function setData and send the text to it as an argument.
Next lets modify our ShareWidget in Flutter:
import 'package:flutter/material.dart';
import 'package:flutter/services.dart';

class ShareWidget extends StatefulWidget {
  // ...
}

class _ShareWidgetState extends State<ShareWidget> {
  var methodChannel = const MethodChannel('examples.share');
  var text = "";

  @override
  void initState() {
    methodChannel.setMethodCallHandler((call) async {
      if (call.method == "setData") {
        setState(() {
          text = call.arguments as String;
        });
      }
    });
    super.initState();
  }

  @override
  Widget build(BuildContext context) {
    return Scaffold(
      body: Center(
        child: Text(text),
      ),
    );
  }
}
We introduced a text variable in the state so we can render the text being sent from Swift. We create a method channel with the name examples.share and then we add a method call handler. This handler will get invoked every time native tries to call a method on the MethodChannel but in this example we only need to worry about the setData function. To keep this example simple we just take the arguments (we know there is only one in this case) and set the value of text to it.
And thats it! You now have a share extension set on up iOS that uses Flutter for it’s UI instead of Swift. If you like this article be sure to check out my other work. Also it always helps if you share this with other people.
You can also follow me on Twitter.


