


This article is part of the series "Animations in Flutter". As the name suggests, the series covers how to add animations to your Flutter apps, what are the fundamental differences between the options you have and how you can go about choosing the best option for you. The series will also include articles on topics that you do not necessarily need to know about but can be useful to understand how Flutter handles animations. To view the full series visit blog.nemishah.dev/series/flutter-animations.
This article will cover implicit animations and how to add them to your flutter applications using only the built in implicitly animated widgets. Implicit animations are animations where you let Flutter handle the details of the animation instead of doing it yourself, for example if you wanted to change the size of an Container widget you would use an AnimatedContainer and update it's state with a new size. Implicit animations are the easiest and most common way of adding animations to your app.
Implicitly Animated Widgets
Flutter provides some built in widgets that are animated versions of common widgets you would use in your app regularly, these widgets handle driving the animation for you when you give them a new value to animate to by updating the widget's state (for example AnimatedContainer or AnimatedOpacity). These widgets allow you to add animations to your app without having to manage the complexity of it yourself, making your code less verbose and simple to understand and maintain.
Animating visual properties
Some of the most common use cases for animations are adding visual feedback to UI elements, like buttons for example. Let's use the native button behaviour of iOS where tapping the button animates the opacity of the button to provide visual feedback of the user.
In the example above we use AnimatedOpacity to animate the opacity of its child whenever the user interacts with the widget. Note that in the example you did not have to handle cases where the user lifts their finger while the animation is in progress, the widget handles all the details for you and if you animate again while another is in progress it simply skips progress of the initial animation and proceeds with the new one (try it out by changing the duration of the animation in the snippet above and lift the pointer before the animation completes)
Animating layout properties
You can also use implicitly animated widgets to animate positional properties like top, left, right and bottom positional constraints, or animate layout properties like size, scale, transform etc. Lets use a image sizing tool as an example of this where we allow the user to modify the size of a image using a slider.
Customisations
While implicitly animated widgets handle the heavy lifting for you, they allow for some amount of customisation. Typically you can use any of the following properties when using these widgets:
- duration
- onEnd
- curve
Duration
As the name suggests this property lets you customise the time over which the animation happens, this property is rather straightforward to use so we will just skip examples for this one.
onEnd
This is a callback that gets executed whenever an animation ends, you can use this as a way to trigger additional actions or functionality.
Curve
This property is the most important property to understand when it comes to implicit animations. The documentation explains curve as follows
An parametric animation easing curve, i.e. a mapping of the unit interval to the unit interval.
Easing curves are used to adjust the rate of change of an animation over time, allowing them to speed up and slow down, rather than moving at a constant rate.
If that clears things up for you then you are smarter than I am, let's discuss what this means. You can think of an animation as a way to change the property's value over time using some given pattern, to understand this further we need to do something most of us hate - Math.
Most of us have had to work with graphs and curves in Math at some point, no matter how simple or complicated. Let's take an example of a very simple graph
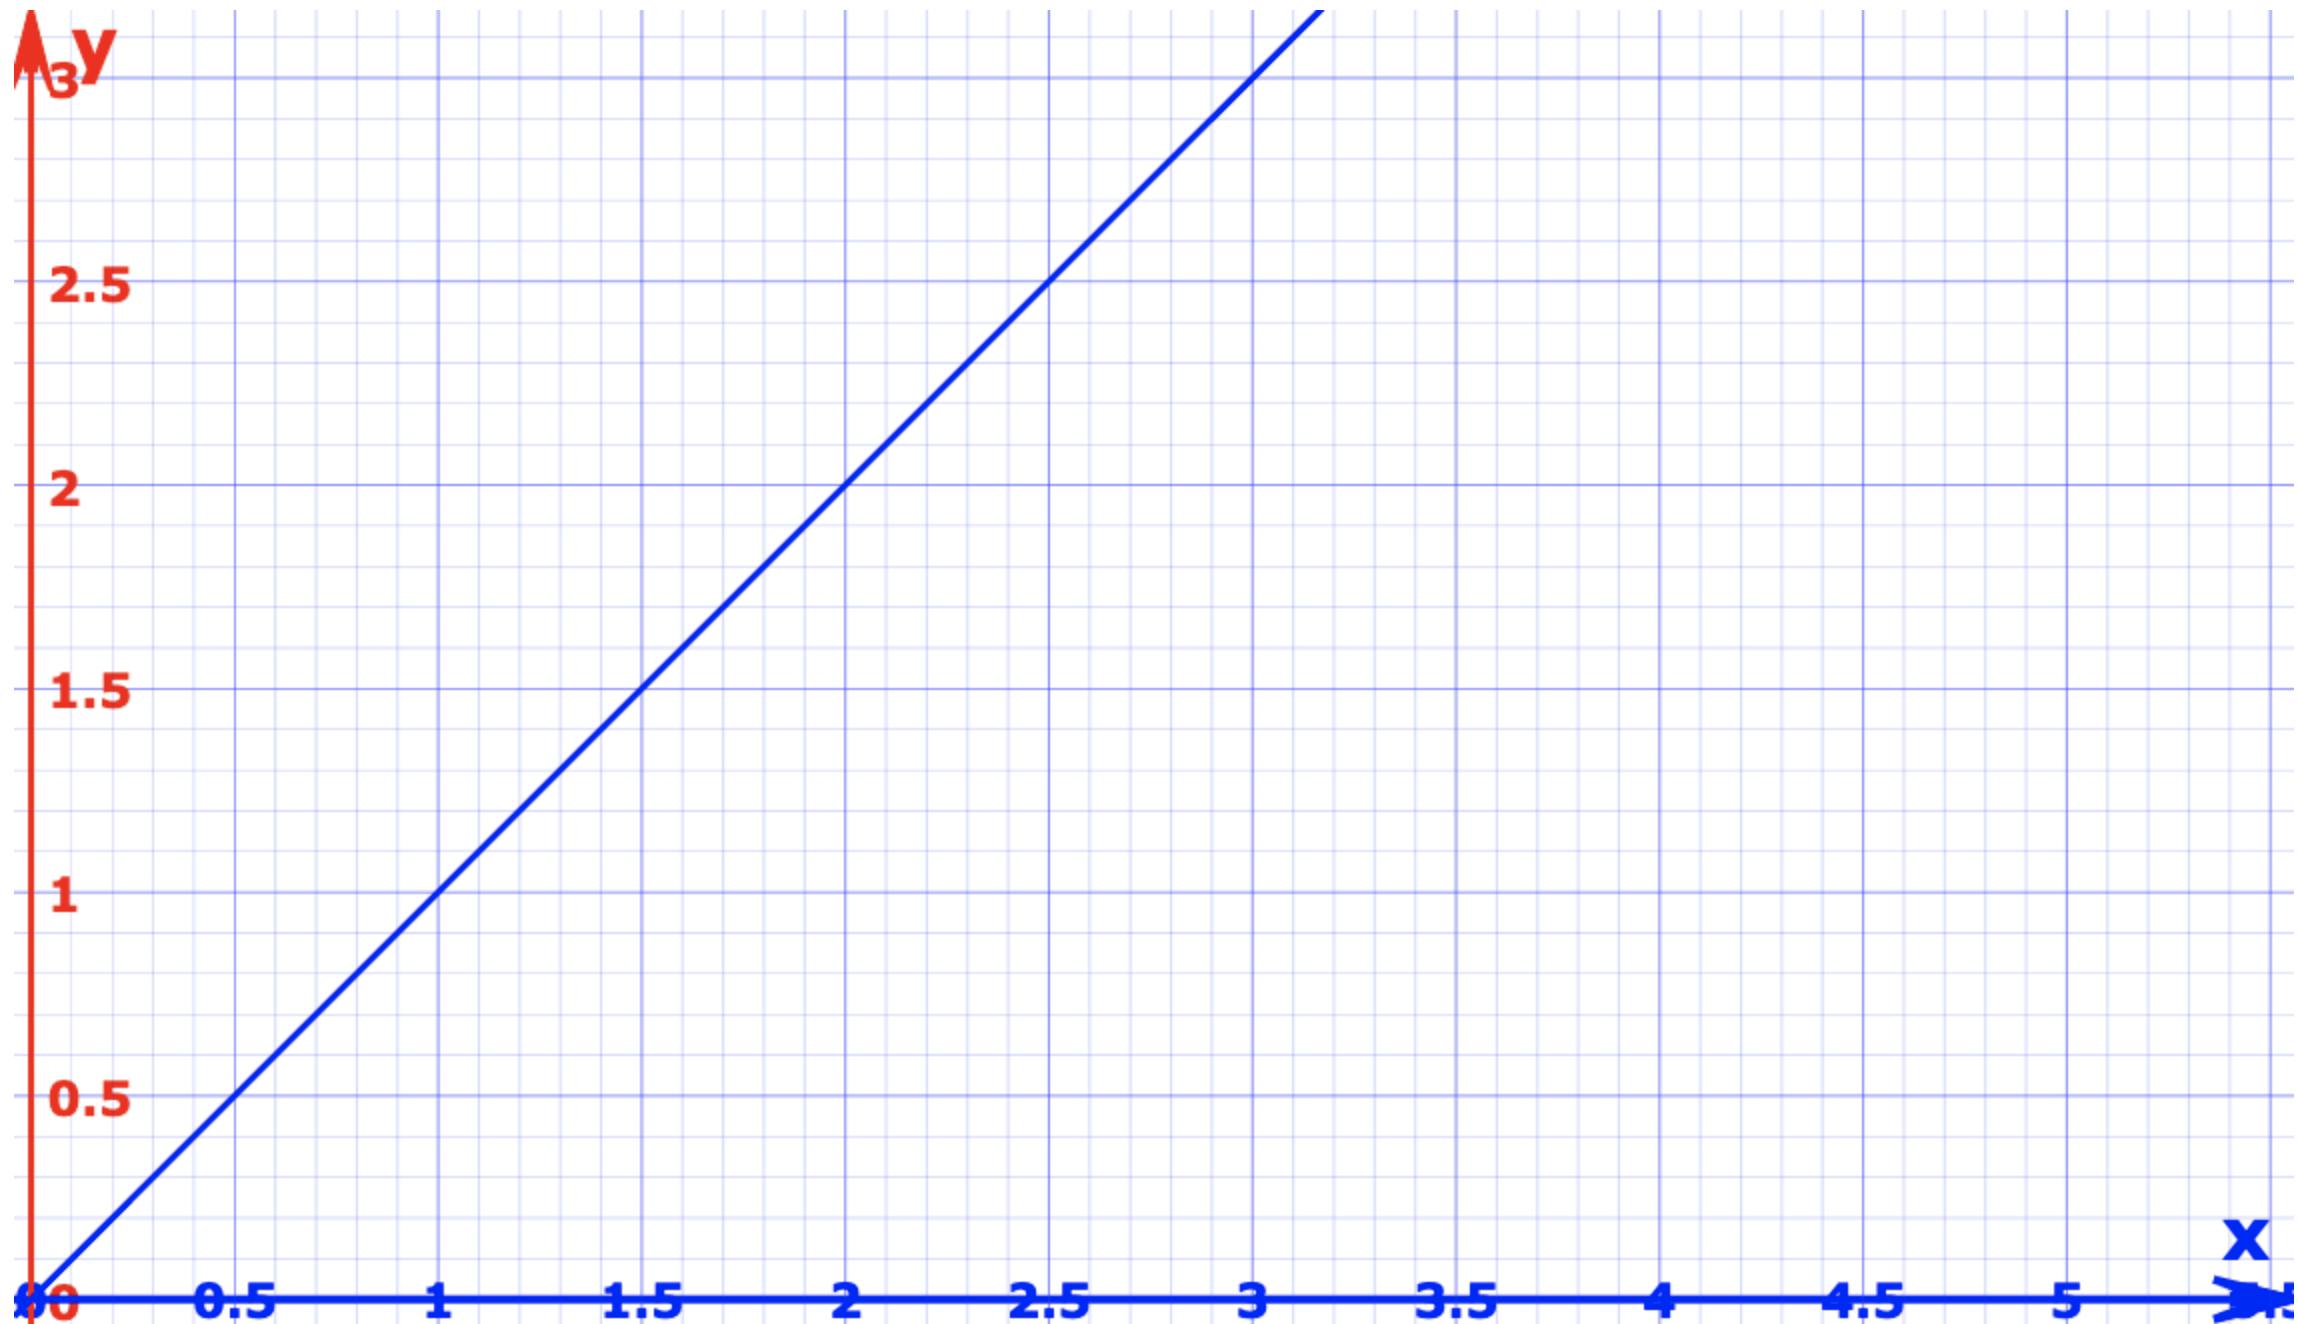
This is a linear graph, meaning the vertical Y values increase with the same amount as the horizontal X values. You can think of curves as functions used to create a graph, the above graph would follow the formula of y=x. Now with that in mind let's consider an animation that is configured to use a linear curve, where the animation value goes from 0 - 1 and the widget position animates horizontally from x position 0 to 100. Because this is a linear curve the animation values are directly related to the position values, i.e when the animation is at value 0 the position of the widget is x=0 and when the animation completes at value 1 the widget position is at x=100, similarly at animation value 0.3 (30% completion) the position of the widget would be at x=30, and at animation value 0.6 the widget position would be approximately x=66. If you were to plot the values of the animation in a table
| Animation Value | Widget Position |
| 0 | 0 |
| 0.3 | 30 |
| 0.5 | 50 |
| 0.7 | 70 |
| 1 | 100 |
So you can see for a linear curve the values have a direct relationship. Similarly other curves follow some formula, you can also create your own curve to use in animations.
Built in Curves
Let's take a look at a few examples of how different curves affect the same animation. We will try and move a simple colored square from the right of the screen to the left of the screen when a button is tapped, and back to its original position when the button is tapped again.
In the above example we use 4 different squares identical in each way except for the color and the curve they use when animating. When you press the button you notice that even though they all use the same duration and all the animations come to 'rest' at the same time they all get there in a different way. This is because each curve uses a different formula which means that the relationship if animation value -> position is defined differently for each square, because of which for the same given animation value the resulting position value is different for each curve.
NOTE: If you keep running the example you will notice a drop in framerate once in a while, this happens because you are trying to animate multiple widgets at the same time. Generally if this is behaviour you want you should use your own explicit animation (which we will talk about in another article) but for the sake of the article this will do.
You can find a list and demonstration of each of the provided curves in the official documentation.
Custom Curves
You can also create your own curve by extending the Curve class, this allows you to have full control over the path the animation will take. Lets try and animate a square like we did before using a custom sin curve.
Not a very useful animation but hey it shows that you can handle the curve however you want.
You can find the rest of the series on blog.nemishah.dev/series/flutter-animations, and if you enjoyed reading this article you can find all my articles on my blog.
You can find me on -